I am a hopeless tinker-er at my work bench, especially during the winter months with cabin fever. I always wondered why Powerbelts are not offered with a solid nose... probably because the hollow points offer superior expansion. However, for something to do I experimented nonetheless and placed a small lead insert into my .45 Powerbelt hollow points. Why? Maybe I might get better penetration, maybe I might get a better ballistic coefficent... who knows. Although my pilot product and method does show signs of consistent manufacturing, I haven't had a chance to get to the bench with it. If my experimental .45's group I might then be interested to see what kind of bullet recovery I get, and perhaps even put them to the test on game if things look good. Anyway, here's what I came up with.
Here's my "how-to" make it. I used the 225 grain hollowpoint as it is one of the more popular:

I used FORNEY lead solder as the hollowpoint lead plug. I liked it because it is pliable with the soft center core. I will straighten-out a length off the spool as best I can BY HAND, then cut it to a length of about 7/8 inch. 7/8" is about the right length, as it still retains some rigidity, yet it's long enough that the "hammering" will not expand the solder at the point where it enters the hollowpoint opening. I next take a file and flatten both ends of the 7/8" piece. I next bevel one end(see red tip in pic) to make it easier to start and seat into the hollowpoint opening.

I then take a toothpick to measure and mark the length of the hollowpoint depth, and mark that length accordingly on the 7/8" piece of lead solder. The next step involves actually placing the lead in the hollowpoint, which can be a little tricky the first time. The diameter of the lead solder is conveniently such that it fits very smug into the hollowpoint opening. In order to insert the lead solder into the hollowpoint, I first take off the plastic skirt from the Powerbelt, then "hand-start" the tapered red tip end of the lead solder into the hollowpoint with a gentle twisting motion... just enough to hold it in place. I then place the bullet into a 13/64 inch hole I drilled in a piece of oak plywood.

The key to getting the solder into the hollowpoint is to VERY, VERY, GENTLY tap it in with a very small hammer. If the solder bends while you hammer, simple straighten it out with a pair of needle nose pliers and continue. By the time you are done hammering the solder should be "close" the the depth line you placed on the solder earlier.
If you've hammered at the right pressure while maintaining an upright angle, the solder should like this sticking out of the bullet.

Now, snip off the end of the solder, but not too close to the flat end of the bullet. You want to leave enogh solder(1/16") to be able to file it down flush accurately.
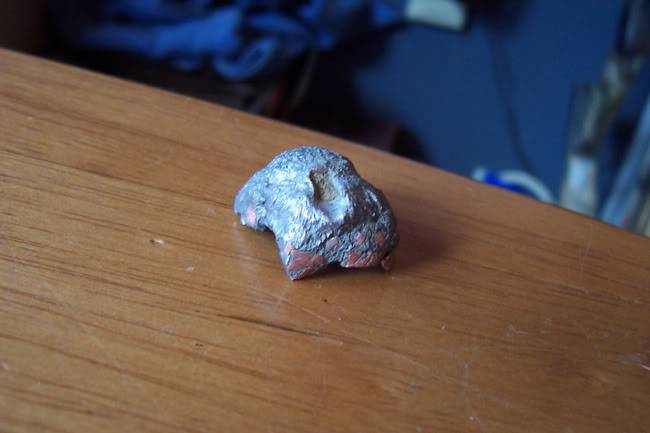
All you need to do after you've filed it flush is to re-attach the plastic skirt onto the bullet and you're ready to go. Here's what the finished product should look like:


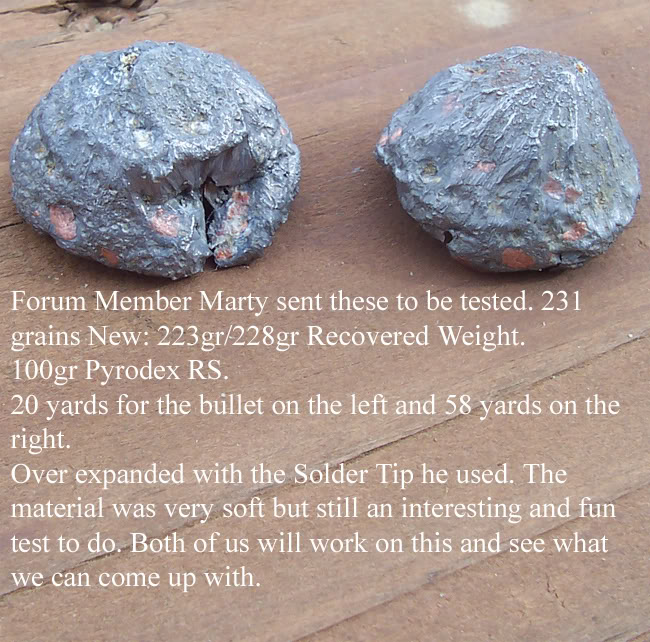
I next weighed the finished products.

I started off my project with 225 grain (without the plastic skirts)Powerbelt bullets. The weight of the finished bullets with the lead inserts were as follows: 231.6 grains,
231.4 grains(pictured), 231.1 grains, 231.1. grains, 231.0 grains and 231.2 grains. As you can see the lead solder insert adds about 6+ grains of weight.
It was a fun project for me. When I eventually get out to the range, I'll follow-up with my results (probably this summer).


 [/img]